Share this blog!

 D3.js is a JavaScript library for manipulating documents based on data. - quoted from https://d3js.org

This post is on how to display a simple bar chart using HTML div elements and d3 JavaScript library. 


data.tsv is the data file we are going to use which has tab separated values (tsv) and header values. Similar to tsv, csv stands for comma separated values which acts similar to tsv files.

When running this however, in certain browsers, simply opening the html file is not sufficient since d3 makes AJAX requests for data. Therefore, the file must be loaded through a web server.

✔ Python users have a simple way to run a web server on the local machine by simply opening the terminal in the file's directory and executing the following command.

python -m SimpleHTTPServer

Once the server is started, simply open the html file using the server.

Eg: http://127.0.0.1:8000/barchartexample.html

This article presents more information on python's simple server.

✔ Or online editors such as Plunker too can be used.

This question on StackOverflow focuses on the file loading problem.

The following is a self explaining code gist relevant to the above displayed bar chart.

Internship diaries #1


This is the first of my monthly diaries of my internship experience at WSO2 Lanka (Pvt) Ltd.

An orientation session was carried out in the first week where we were introduced to the company hierarchy, organizational levels, rules and ethics, the products of the company and the resources available to use which can be used to improve our knowledge on the technical aspects. I personally find the culture of the company uniquely interesting where each employer is free from strict rules but everybody is genuinely passionate about what they are doing.

The products of WSO2 are open-source and they are based on the carbon kernel which serves as the core of each product. Components are integrated with the core to develop features. A product is basically a set of features assembled together to achieve a single or a set of specified functionalities.

In the first two days of the second week, project demonstrations were held from which we were asked to list our preferences. I selected the project named “Developing a data mapping tool plugin for VSCode” which was under team Developer Studio. My assigned mentor is Mr. Jasintha Dassanayaka. For the rest of the second week, I had a hands-on experience with the data mapping tool plugin for Eclipse.

The third week was spent on analyzing the source code of the data mapping plugin tool for Eclipse. The main features analyzed were the objects, their interactions, method calling sequences, file loading implementations and schema saving implementations.

The fourth week was spent on developing a static web app for data mapping tool using JavaScript. The implementations of file drag and drop, XML file parsing and the mapping functionality were mainly focused and completed successfully. To implement the mapping functionality, many libraries such as GoJS, jqTree, jsPlumb were researched but used jsPlumb due to the abundance of tutorials and community forums.

The problems faced during this period were overcome by the support of my mentor and on-line resources such as StackOverflow.


Left element 1
Left element 2
Left element 3
Left element 4
Left element 5
Right element 1
Right element 2
Right element 3
Right element 4
Right element 5


The code gist is as follows:

How to view login information

Basically Ubuntu saves all the log information in a log file inside /var/log/auth.log which you can access manually or use the following command in the terminal.

sudo less /var/log/auth.log 


How to disable guest login


In the file /etc/lightdm/lightdm.conf add the following line

allow-guest=false

If you are using a newer version of Ubunutu, try the file /usr/share/lightdm/lightdm.conf.d.


Make sure to restart the system to take effect.

In order to allow guest login again, remove the code line from the file.


Basically, what we are going to do is to install the developer studio kernel and the platform bundles without installing the tooling. Additionally, the GMF features and EMF SDK too must be installed.

Help->Install new software->Add and specify the location for platform bundles which will automatically add the kernel too. Proceed with the installation steps.

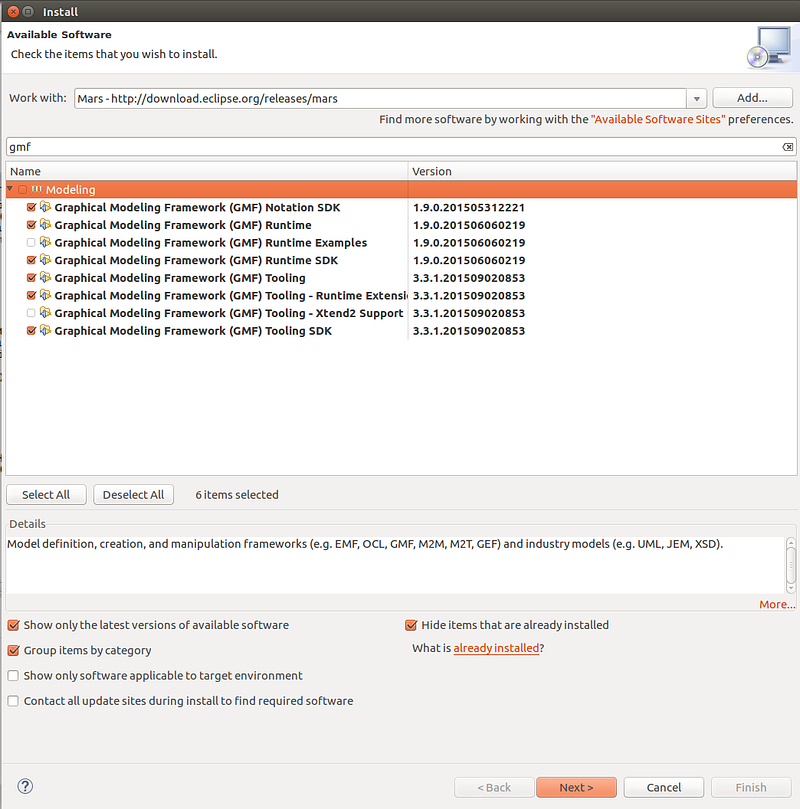
Once the platform bundles and the kernel are installed, go to the install window again, select Mars releases from the drop down menu in ‘Work with:’ and filter the software using the keyword GMF

Select all except runtime examples and Xtend2 support.


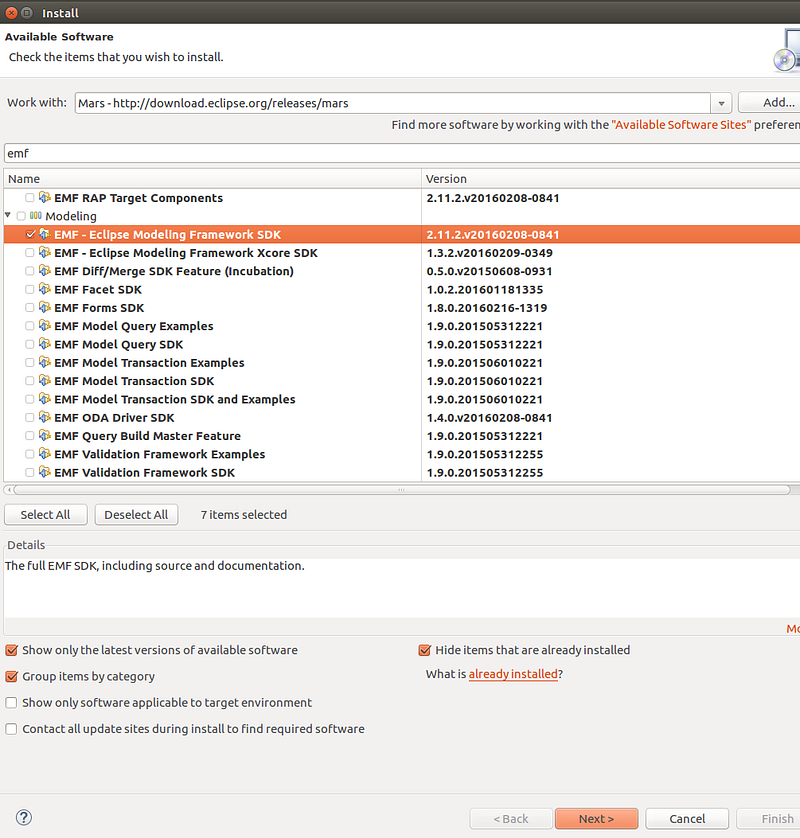
Filter the Mars releases again using keyword EMF and select EMF SDK. 

Install the GMF and EMF software.


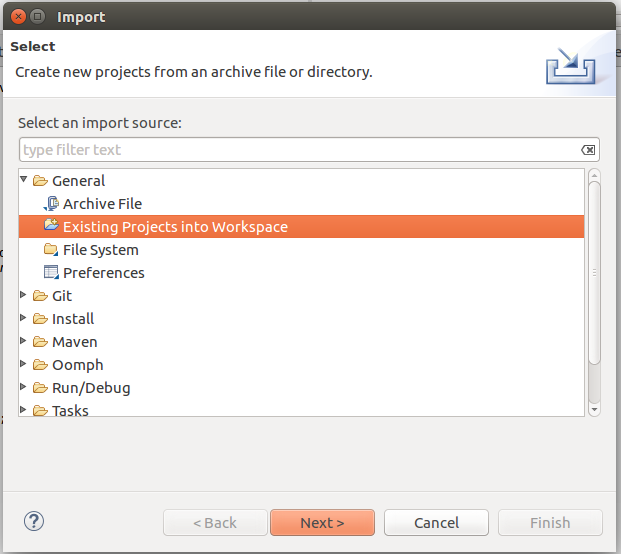
Fork and clone ESB tooling source code in the local machine and import (File->import) to Eclipse as an existing project.


This sample project maps XML data set to a JSON data set. (The input and output formats are specified at the end of the article)

1. In Eclipse with ESB tooling, create a new ESB Solution Project(If it is not already suggested start typing to filter or check under WSO2->Message Mediation->Project types). Make sure to uncheck Create Connector Exporter Project.

2. Once you create the project, you will see that two additional projects, the CAP and Registry are created.

3. Now we will create a new REST API. Right click on the project and select New->REST API

4. Give a name to the API and a context (eg. PeopleMapping and /peopleconvert respectively).

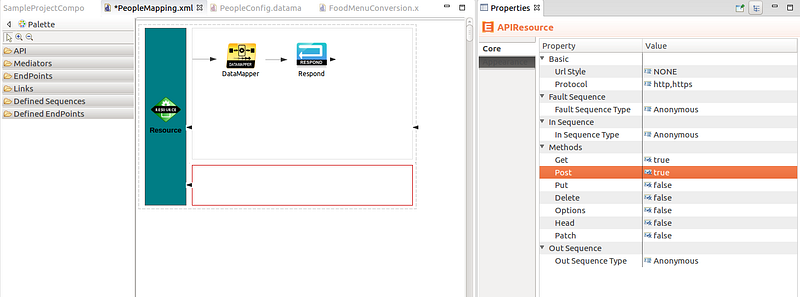
5. In the XML, add a DataMapper and a Response. We will configure the DataMapper to suit our requirements and check the Response using Postman, an API tester. In the properties, set the POST to true.


6. To start configuring the DataMapper, double click on it, specify a name and press OK.

7. To configure the input, right click on input-> Load input-> Select XML and point to your input XML file. Similarly, to configure the output, right click->Load output->Select JSON and point to the output json file.

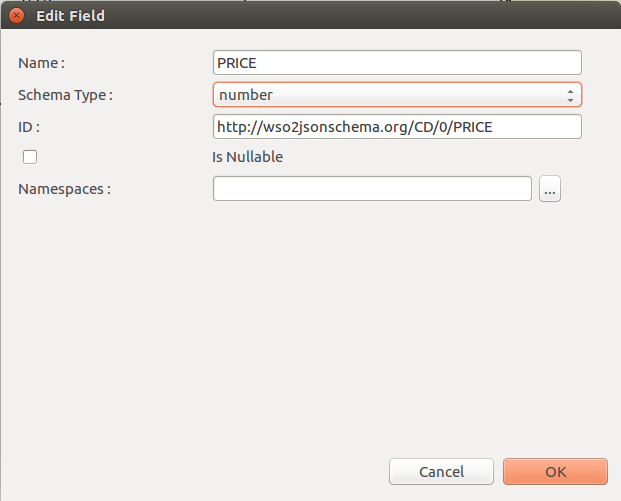
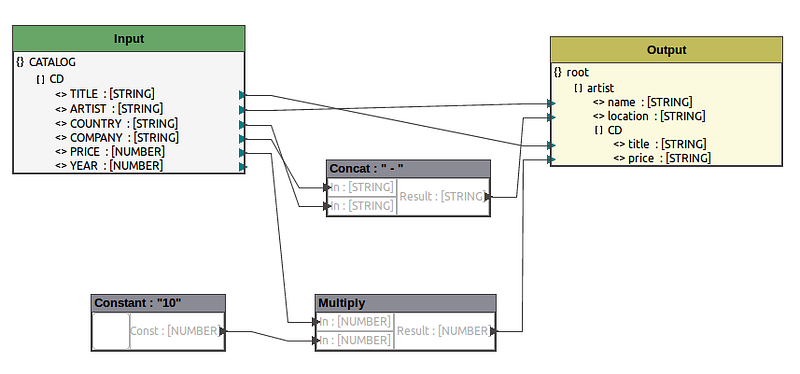
8. Once loaded, the attributes will be visible, simply drag and drop to map to corresponding output set. Fields can be edited by right clicking on the field.


There are many operators which can be used to get the desired mapping.


9. To deploy the API, right click on the Composite Application->Export->Select WSO2 Platform distribution->Select Composite Application Archive

10. Once the CAR file is created, start the WSO2 ESB Server and in the management console add the application by uploading the .car file.

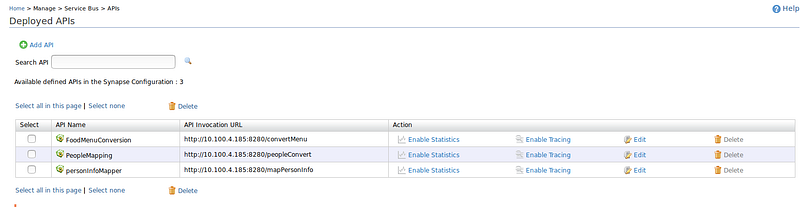
Once the application is uploaded, the API will be displayed in the deployed APIs. (eg. PeopleMapping)


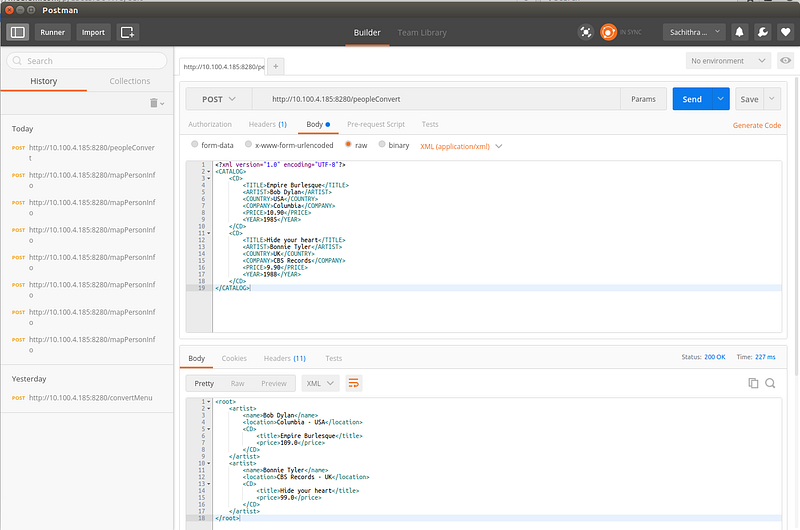
To test it in Postman, copy the invocation URL. Copy the input file content in the body and specify as XML(application/xml).


When the message is sent, the required response will be obtained.


Input XML:-
<?xml version=”1.0" encoding=”UTF-8"?>
<CATALOG>
   <CD>
     <TITLE>Empire Burlesque</TITLE>
     <ARTIST>Bob Dylan</ARTIST>
     <COUNTRY>USA</COUNTRY>
     <COMPANY>Columbia</COMPANY>
     <PRICE>10.90</PRICE>
     <YEAR>1985</YEAR>
   </CD>
   <CD>
     <TITLE>Hide your heart</TITLE>
     <ARTIST>Bonnie Tyler</ARTIST>
     <COUNTRY>UK</COUNTRY>
     <COMPANY>CBS Records</COMPANY>
     <PRICE>9.90</PRICE>
     <YEAR>1988</YEAR>
   </CD>
</CATALOG>


Output JSON format:-
{“artist”: [{
             “name”: “sample_artist_name”,
             “location”: “artist_location”,
             “CD”:[{
                    “title”:”saple_title”,
                    “price”:”sample_title”
                  }]
           }]
}


For this, Eclipse Mars distribution is required (Mars 2 as of now).
In Eclipse, go to Help -> install new software
Click Add and paste the repository URL in the location and click OK. I used the following URL.

http://builder1.us1.wso2.org/~developerstudio/developer-studio-kernel/4.1.0/esb-tooling/releases/5.0.0/rc1/

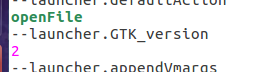
If you’re running on Ubuntu 16.04 and if the software list is displayed as ‘pending’ for quite some time, make sure the GUI bug is fixed.
Hint: Add the following lines of code in the file named as eclipse.ini
openFile
--launcher.GTK_version
2


Once the list of software is displayed, select all and proceed with the installation.

For more information, please refer WSO2 docs.

"OpenShift is Red Hat's Platform-as-a-Service (PaaS) that allows developers to quickly develop, host, and scale applications in a cloud environment."

Here is a list of simple guidelines that will help you if you are struggling with the complex terms and tools.

Getting started

First of all you must have an account in OpenShift, which is quite simple. In order to create applications, you must first install OpenShift Client tools. OpenShift provides many useful guidelines and this particular set of articles is quite useful when installing the client tools. Just remember, if you're installing Ruby on Windows, try Ruby versions 1.9.3 or 2.0.0  because the newer versions might cause problems during rhc setup.

So if you're a Windows guy, go through this article until the very end. It provides a detailed guide about setting SSH keys when installing client tools.

Creating the application

In order to host a JSP project, you can select Tomcat 6(JBoss EWS 1.0) or Tomcat 7(JBoss EWS 2.0). Once you create it, copy the repo link and clone it to your local machine.


Adding a database

If your project is already built and you have a database in your local machine that must be linked to the hosting, you must add relevant cartridges to your application(As shown above). As they instruct, keep a note of the credentials that are assigned for you. 

If you are using MySQL, you can simply use phpMyAdmin to import a dump file that contains the structure and data of your database. 

In your project, edit the credentials to match those assigned for you. Basically what you will need are username, password, databasename and databaseURL. In the URL, which they will inform as 
Connection URL: mysql://$OPENSHIFT_MYSQL_DB_HOST:$OPENSHIFT_MYSQL_DB_PORT/
make sure to replace the Host and Port with valid credentials. You can either use System.getenv method or directly hardcode credentials stated in phpMyAdmin. 

Uploading the war file

Once the project is all set, create a war file of the project. If you're a Netbeans fan, you can simply clean and build the project and Netbeans will create the war file in the dist folder.

In the repo cloned to your local machine, remove src folder and pom.xml file. Copy the newly created war file and paste in the webapps folder and rename the war file as ROOT.war which will set it as the root source.  

Finally go back and add, commit and push the changes to the repo using regular commands.

Good luck!
In order to perform PayPal testing, you must first need sandbox accounts. Sandbox accounts act as real accounts but the transactions that happen are not actually monetary - they only demonstrate the transactions. You can simply create them by browsing to Accounts in PayPal Developer Dashboard. PayPal Developer Documentation has numerous useful documentations for developers.

Make sure to create both a buyer(Personal) and a seller(Business) accounts.

Once the sandbox accounts are set up, you can use the following template to implement the "Buy Now" button.


You can alter the values of item and amount to be directed from the item details and proceed.
Next PostNewer Posts Previous PostOlder Posts Home